Friday, May 13, 2016

Ikat & Rhinestone Nail Art


Hello! Happy Friday! I hope you're all ready to have a great weekend. Today I'm sharing this ikat inspired nail art design with you. I also threw in some rhinestones because I haven't used any in a while. I feel like these ikat designs are a little misunderstood because a lot of people don't even know what it REALLY is. Ikat (ikkat) is a dyeing technique used to pattern textiles. The yarns are wrapped tightly in little bundles and then are dyed prior to being made into the textile. So really... ikat doesn't have any kind of specific pattern. When people say "ikat" they're sort of referring to the way the brushstrokes look in the art.  Most people who do ikat nail art designs will make them using small vertical strokes which give it a similar look to ikat. I could go on, but I'm not an expert and Google would be able to help you more than I can. I just wanted to give you some sort of idea as to what it is.


Products Used:
  • Beauty Secrets - Base Coat
  • Wet 'n' Wild Megalast - Whipped Topping
  • China Glaze - Custom Kicks
  • Zoya - Cole
  • China Glaze - Lemon Fizz
  • Butter London - Hardwear P.D. Quick Top Coat
  • Rhinestones from Born Pretty Store and MoYou London


I think the color combination I picked is really cute for the upcoming spring and summer months. Obviously, it can be changed to any color which also makes this a fun design.


If you want to see how I created this design, check out my video tutorial below!
* Embedded video coming soon!*


Thursday, April 28, 2016

Doughnut Nail Art


Hey everybody! Guess who got a new camera. ME! Guess who doesn't know how to work all the fancy new settings. ME! Seriously though, it's a struggle. I had a DSLR before, but my new one is a lot more fancy than the one I had. It's still the same, but completely different. I've also realized that adjusting photos in Lightroom is A LOT easier than adjusting the color in Photoshop. That's another thing I'm trying to get used to. Hang in there while I get all my settings to the way I like them.

ANYWAY... Nail art! I did some doughnuts! Donuts? Doughnuts? They're both the same to me. Apparently "doughnuts" is the proper term, but "donuts" is also correct. They both date back pretty far, so if you're crunched for time, you can be like me and always use "donut".

Products used:
  • Beauty Secrets Base Coat
  • OPI - Don't Pretzel My Buttons
  • Essie - Pinkadelic
  • Apple Barrel Acrylic Paint
  • Butter London P.D. Quick Top Coat
  • Dotting tool
  • Liner brush


I bet I made you hungry for some donuts, yeah? ;)

If you want to see me create this design on my nails, and want to give it a try yourself, then check out my video tutorial below!


Saturday, March 26, 2016

Flamingo & Floral Nail Art


Hey everybody! I hope you're having a great weekend! I'll make this post super short since it's a Holiday weekend. Today I have some flamingo nail art photos to share with you. Along with the flamingos I also created a polka dot and floral nail art design. Everything is hand painted, like usual, with a small nail art brush and a dotting tool. The tutorial for this design will be embedded below.


Products Used:
  • Beauty Secrets Base Coat
  • China Glaze - New Birth
  • Plaid Apple Barrel Acrylic Paint
  • Butter London - Hardwear P.D. Quick Top Coat
  • Dotting tool
  • Nail art brush


If you want to see how to create this design, then watch my video tutorial below.


Tuesday, March 8, 2016

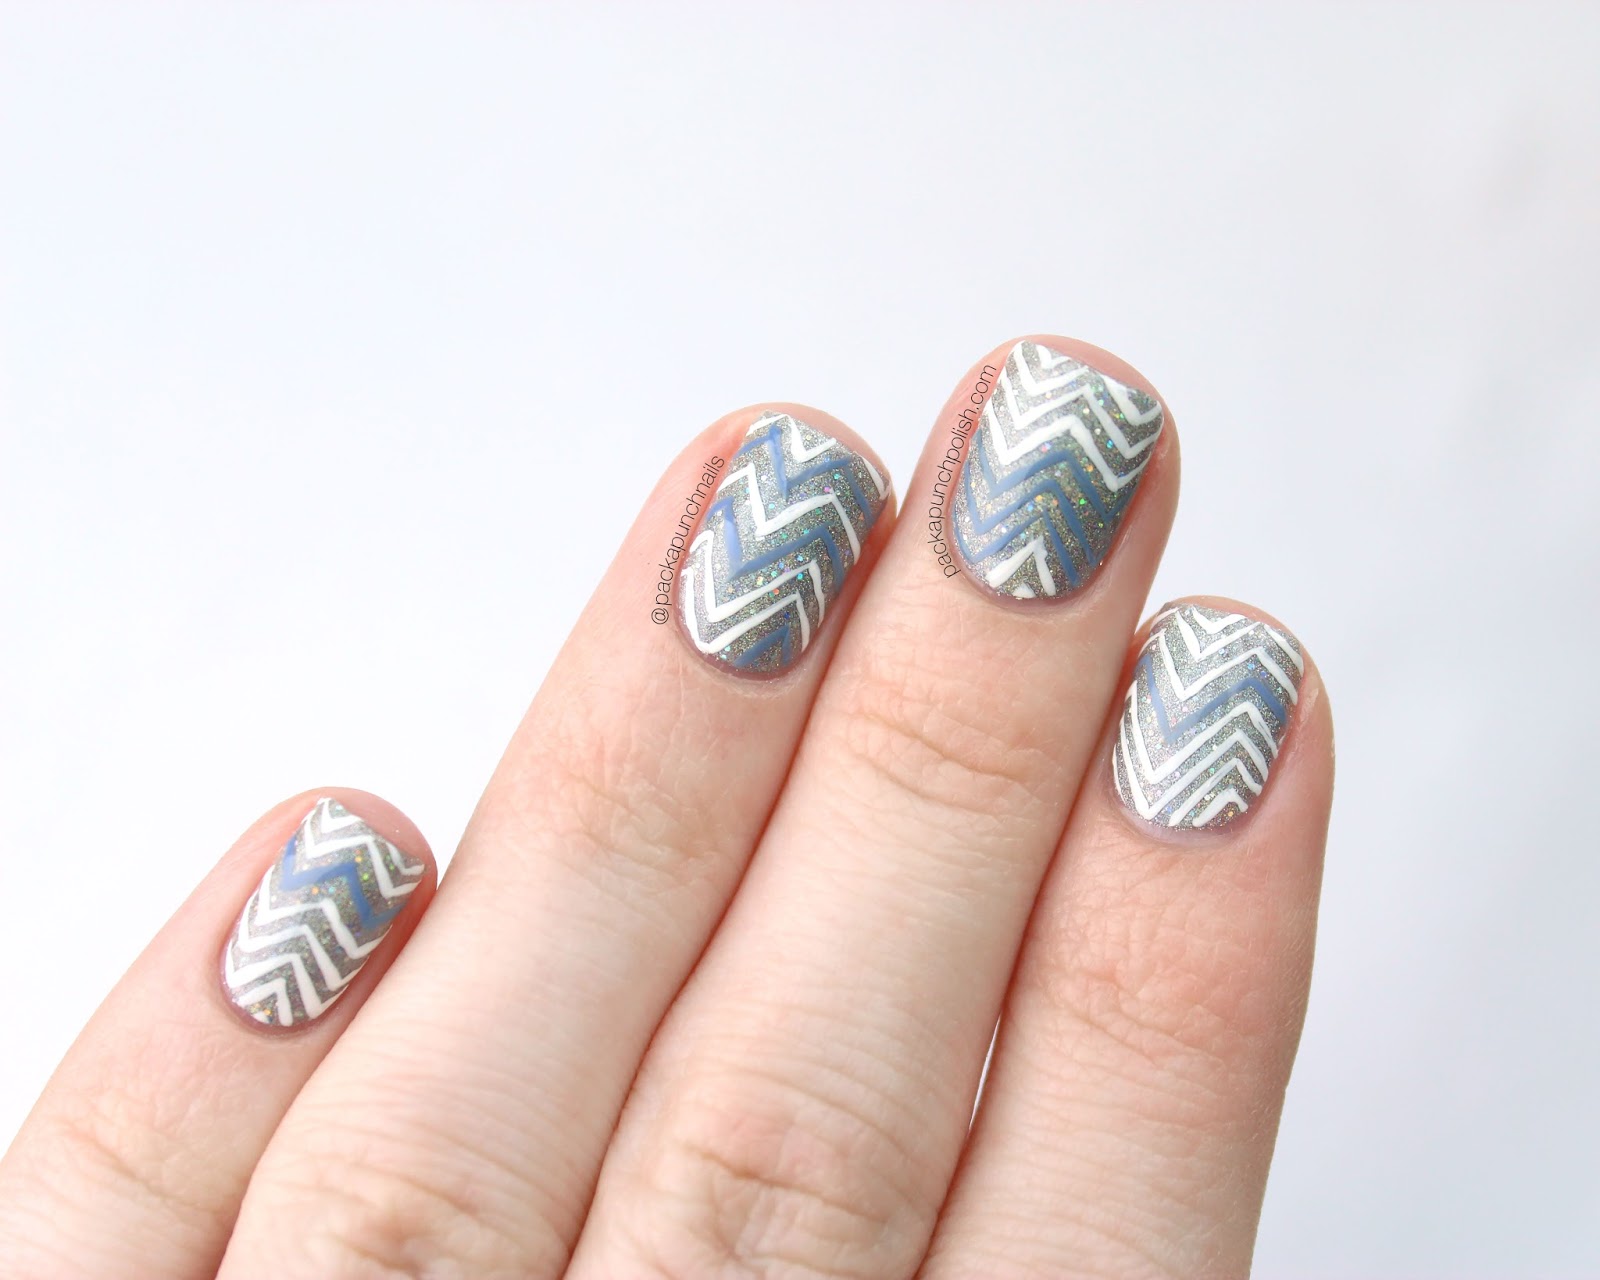
Chevron Nail Art with Video Tutorial


Hello everyone! I hope you're all having a great day! My Tuesday is going pretty great so far. I did a lot of adulting today. Which means I was on the phone all day dealing with tax and insurance things. Sounds fun right? Now that I'm done with all of that I can share this fun little chevron nail art design with you! 

I always love chevron designs but I always have a hard time hand painting them. I feel like they get super wonky or all the lines are completely different sizes or going in different directions. However, this time I feel like I did a pretty good job! The lines are thin and for the most part look the same! YAY! SUCCESS! "But Sam, why don't you just use nail vinyls? They're so easy!" They are, but I really don't like the idea of using nail vinyls for nail art. I totally understand why people use them and they're awesome, but I like the challenge of hand painting things. Plus, not everyone has the money to buy them. (Ahem, me. I'm a broke 23 year old fumbling around learning how to be an adult.) I don't like paying for things I'm going to use once and then immediately throw out. I'm not saying I would never use them, but meh... Not my thing. If you want to know all the products used make sure to check out the list below. And as usual the tutorial for this design is below all the photos. :) I hope you guys have an awesome week and I'll catch you later.

Products Used:
  • Zoya Anchor Base Coat
  • Orly - Mirrorball
  • China Glaze - Fade Into Hue
  • Apple Barrel Acrylic Paint
  • Lauren B. Beauty - Gel-Like Top Coat


Monday, January 25, 2016

Floral Mix & Match Nail Art


Hey everybody! I hope you're having a great week so far! Today's nail art is a little mix and match-y with some floral print, polka dots, and stripes. I don't have too much to say for this design. I just went with what I was feeling and this is what I came up with. Everything is freehanded except for the stripes. I used striping tape for those nails because it's a million times easier. I can't draw a straight line to save my life.


Products Used:
  • Beauty Secrets - base coat
  • Wet 'n' Wild Megalast - Whipped Topping
  • OPI - Privacy Please
  • Wet 'n' Wild Wild Shine - Black Creme
  • China Glaze - Seas The Day
  • China Glaze - Don't Get Derailed
  • China Glaze - Secret Peri-wink-le
  • China Glaze - City Siren
  • China Glaze - Dance Baby
  • Plaid Apple Barrel - acrylic paint
  • Striping tape
  • Butter London - Hardwear P.D. Quick top coat


Want to learn how to create this design? Watch my video tutorial!


Saturday, January 9, 2016

Koi Fish Nail Art with Video Tutorial


Hello! Wow! It's been a while. I haven't uploaded or blogged in about a month. I'm here to share some koi fish nail art with you! There's just something about koi fish that is super relaxing to me so I wanted to put some on my nails. I was going to use a creme polish, but I decided to go with glitter instead. I'm super happy I did! I think it gave it a little extra something that it could have been missing, but is now not missing.


Products Used:
  • Beauty Secrets base coat
  • Wet 'n' Wild Megalast - Whipped Topping
  • China Glaze - Isle See You Later
  • China Glaze - Blue Hawaiian
  • Plaid, Apple Barrel acrylic paint
  • Butter London - Hardwear P.D. Quick Topcoat


I'm really happy with how these turned out. I think they're super cute. If you want to learn how to create this nail art design feel free to watch my video tutorial below!


Saturday, December 5, 2015

Cute Reindeer & Fair Isle Holiday Nail Art


It's officially December! Which means holiday nail art is fair game. Today I'm sharing my first holiday design of 2015 with you! It's a really cute reindeer with a simple style fair isle design. I am so proud of my little reindeer! I think he's absolutely adorable. I would definitely put him on all of my nails instead of just one. I can't get enough of him. My boyfriend named him Ralph. hahaha! So if you want a pet... here you go! Nail art pets.


I decided that I'm going to start doing a quick list of the products used for nail art designs because I feel like it's easier. Not only for me, but also people who aren't too fond of reading blog posts. For the most part, people don't stay on my blog posts too long. That's according to my analytics anyway. I assume most people come for the photos, which is 110% alright with me.


Products Used:
• Zoya - Anchor base coat
• Motives Cosmetics - Wedding Dress
• Butter London - Pillar Box Red
• China Glaze - De-Light
• Plaid Apple Barrel Acrylic Paint
• Butter London - Hardwear P.D. Quick top coat
• Nail art brush
• Dotting tool


I will have a few more holiday designs before December passes, but I'm pretty happy to say that I'm proud of my first one. I hope you guys are having a great start to the new month!


If you want to learn how to create this design yourself, feel free to watch my video tutorial below!


Monday, November 30, 2015

Watercolor Floral Nail Art


Hey everyone! I hope you're having a smooth Monday. Hopefully you're easing yourself into the real world again after binging on turkey and other delicious food! Today I have a floral print nail art to share with you. A watercolor floral!


For the white watercolor floral base I used Motives Wedding Dress. For the purple nails I used China Glaze All Aboard. The flowers were done with Apple Barrel acrylic paint by Plaid. The glitters on the purple nails are from Born Pretty Store. I also used two different top coats for this design. I went with Butter London's Matte Finish top coat for the floral and then Lauren B Beauty's Gel-Like top coat for the others. 


I'm hoping these colorful flowers will keep the winter blues away! I'm definitely a summer girl even though my birthday is in December. Anything under 70 degrees is too cold for my body. What do you guys prefer? Hot or cold weather? Or are you somewhere in between? 


If you want to see how I created this design and want to give it a try yourself, then check out my video tutorial below!


Saturday, November 21, 2015

White Marble Nail Art with Tutorial


Hey everybody! Happy Saturday! I hope you're having a great weekend so far. I have white marble nail art to share with you today. White marble has been super popular for the past couple months. I have to admit, I really love it too. I personally think white marble never goes out of style. It's always a classic. With that said, it's way harder to hand paint a marble pattern on my nails than I thought. Marble is never the same so it's hard to get it wrong, but it does have a certain pattern to it that makes it a little bit difficult to hand paint.


The white base color I used for this design is Wedding Dress by Motives. For the rest of the design I used black and white acrylic paint from Plaid. The Apple Barrel kind. It's super easy to mix and thin out which is perfect for this design. I used a few different nail art brushes for this. Some of them were from Winstonia and some were generic ones that I cut myself. The gel like top coat I used is from Lauren B. Beauty.


I think I might give this design another try later on. This was my first time trying to imitate white marble. I think it looks okay, but I feel like I could make it look better now that I know what I'm doing.


If you want to see how I created this design or if you want to learn how to do it yourself, then check out my video tutorial below. 


Wednesday, November 4, 2015

Delicate Glitter Gradient with Bones Nail Art with Tutorial


Hey guys! I'm going to make this post really quick because it's kind of Halloween related and most people are over it already because it's now November, but I wanted to share them with you anyway! This was the nail art I had on my nails for Halloween. I wanted to get this out before Halloween, but since I did it the night before, it was too much of a rush for me to finish the video.


I used Cult Boneyards as the base color and then painted on tiny little bones with a dotting tool and a nail art brush with acrylic paint. The glitter is OPI Pirouette My Whistle. The top coat is Lauren B. Beauty's Gel-Like top coat.


If you want to see how I created this design or learn how to create it on your own nails then check out the video below.


Thursday, October 29, 2015

Skulls and Bones Nail Art with Video Tutorial

Hey everybody! Today is my last Halloween themed nail art design for the year!  Although, you may see skulls in nail art designs all year long from me because I love them so much. For this design I covered my nails in skulls and bones over a sparkly base. 


I started by painting my nails a solid black using Wet 'n' Wild Black Creme. Then I added Zoya Storm for some beautiful holographic sparkle. I love this polish! It's so pretty. The skulls and bones were done with Apple Barrel acrylic paint. I used a dotting tool as well as a small nail art brush to apply them. The top coat I used is Rimmel London Lasting Finish Pro. I don't hear about this top coat very often and I love it! It's from the drugstore and I always find it on sale. It's one of my favorites.


Here's a fun fact. Right after I finished doing this design on my nails I had an accident with my right hand that landed me in the emergency room. I won't go into detail about what happened to spare you the gore, but the 2 weeks after recording this design was rough. Good thing I made my nails look pretty! It was a good conversation to have while doctors and nurses were power washing my wounds with freezing cold water. Now I have 2 gnarly scars on my right hand.


I hope you enjoyed my small Halloween series. I wanted to do more, but unfortunately the hand accident put a stop to that. If you want to see how I created this design and want to give it a try, check out my video tutorial below!


Sunday, October 25, 2015

Bruised Nails Nail Art with Video Tutorial


Happy Sunday everyone! I hope you've all had a great weekend. Today I am sharing this bruised nail art design with you. Lately I've been learning about SFX and watching loads of videos about it on YouTube. I took the idea of the bruising technique that is very popular in SFX and made it into nail art. I think this looks pretty cool!


The base color I used for this design is Samoan Sand by OPI. It's seriously the perfect nude for my skin. I'm going to be so sad when I run out because it's now discontinued. I also used Butter London's Matte Finish top coat. All of the bruising colors were mixed using Apple Barrel acrylic paint. I used dark green, purple, blue, red, bright green, yellow, and black. I applied it with a sponge that I ripped up so it had an awesome textured effect. You can see how I did that in my video tutorial below! Once I finished applying all of the colors I added another layer of the matte top coat because, obviously, bruises aren't shiny. 


If you want to see how I created this design then feel free to watch my video tutorial below!


LinkWithin

Related Posts Plugin for WordPress, Blogger...